


Next.js On Demand Revalidation with WordPress as a headless CMS
How to implement Next.js beta feature to revalidate your posts as you update them on WordPress


You have probably already used the revalidation feature on statically generated pages. Revalidation on Next.js means that the server will cache a version of your page for a number of seconds, so every request to this page during this time will receive an "old" version of it until the cache time reaches its end.
Once the time is over, the following request to the page receives a header indicating the page is not fresh (stale), so it tries to build the page again on the background with fresh data. The following request to this one will then receive an updated version and the "cache timer" starts all over again... That's why the flag set on the header is called stale-while-revalidate.
Since version 12.1.0, Next.js comes with an experimental feature that allows you to ignore the revalidation cache time and rebuild the page on the background whenever you want! This makes it possible for us to call for a page to revalidate every time we update it on Wordpress, which means that your front end will always be updated, with almost 0 delay!
Let's get into it then!
Getting Started
I'm assuming you have both environments set up and ready to go. A simple create-next-app should be fine for this practicing purpose, as well as a regular local WordPress installation.
Setting Up Next.js
We usually set up the back end before going to the front end, but with this we'll do it the other way around! The first thing to do is to set a new environment variable to be our secret token. On the root folder create a .env file and add a new variable called REVALIDATION_TOKEN. You can get any type of text/hash to be your token.
.env
REVALIDATION_TOKEN="randomsecrettoken"
Now, go to /pages/api/ and create a new file called revalidate.ts (I'm using TypeScript, but .js won't be much different). This will be our API route to revalidate the pages/posts. As it is a Next.js API route, it follows a standard pattern:
/pages/api/revalidate.ts
import type { NextApiRequest, NextApiResponse } from 'next'

export default async function handler(
  req: NextApiRequest,
  res: NextApiResponse
): Promise<void> {

  // our code will go here

}
Our handler function will receive a request from the back end, process the revalidation and return a status response.
The revalidation function
Next.js revalidation function needs 1 parameter only: the path to the page we want to rebuild. So, we can expect a parameter path and another one called token (if we ignore this one, our api endpoint will be unprotected and people can make some expensive calls to your server). Our API endpoint will be something like:
{domain}/api/revalidate?path=/blog/post/1&token=randomsecrettoken
To get this data inside our handler, we can destructure the request like this:
/pages/api/revalidate.ts
import type { NextApiRequest, NextApiResponse } from 'next'

export default async function handler(
  req: NextApiRequest,
  res: NextApiResponse
): Promise<void> {

  const { path, token } = req.query

}
Okay! Now we can check if the token we received is the same we set in our .env file and if we have a path. If the token doesn't match, we can already send a response with a failure status.
if ((token as string) !== process.env.REVALIDATION_TOKEN) {
  return res.status(401).json({message: "Invalid token"})
} else if ((path as string).length === 0) {
  return res.status(401).json({message: "Path is required"})
}
As I'm using TypeScript, I need to say that I want to use token as a string, since its type can be both string or string[].
Finally, we can try to revalidate the page we want. We need to put the function inside a try catch block, so we know wether it went well or not. This is the final code for our API endpoint:
/pages/api/revalidate.ts
import type { NextApiRequest, NextApiResponse } from 'next'

export default async function handler(
  req: NextApiRequest,
  res: NextApiResponse
): Promise<void> {

  const { path, token } = req.query

  if ((token as string) !== process.env.REVALIDATION_TOKEN) {
    return res.status(401).json({message: "Invalid token"})
  } else if ((path as string).length === 0) {
    return res.status(401).json({message: "Path is required"})
  }

  try {
    await res.unstable_revalidate(path as string)
  } catch (err) {
    return res.status(500).send("Error revalidating page")
  }

  return res.status(200).json({
    revalidated: true,
    message: `Path ${path} revalidated successfully`
  })

}
Before we can move on, we need to expose our token to the server by adding it to next.config.js:
const nextConfig = {
  // [...]
  env: {
    REVALIDATION_TOKEN: process.env.REVALIDATION_TOKEN
  },
  // [...]
}
Setting Up WordPress
To set up our back end, we'll need to add a callback to a hook called "save_post". Every time we save a post this hook will be called and from it we'll make a request to our frontend enpoint we've just created.
Getting the revalidation token
Inside your functions.php, declare a const with the same token you used in your front end.
define('REVALIDATION_TOKEN', 'randomsecrettoken');
Adding the hook
Still inside your functions.php file, let's add the action to fire when our hook is called.
add_action("save_post", "revalidate_post", 20, 1);
Done. Now our hook "save_post" calls to a function named revalidate_post, which we'll declare just below this action.
function revalidate_post($post_id) {
  // our logic will go here
}
In this example, I will assume my front route for a post demands a slug, so we need to get the slug of the post we received the id from.
function revalidate_post($post_id) {
  $post = get_post($post_id);
  $slug = $post->post_name;
}
Nice, now we have everything we need to call the revalidation. Now, there are different ways to call an API from inside your Wordpress functions. I will be using curl to do the job. Our final code will be something like:
define('REVALIDATION_TOKEN', 'randomsecrettoken');

add_action("save_post", "revalidate_post", 20, 1);

function revalidate_post($post_id) {
  $post = get_post($post_id);
  $slug = $post->post_name;

  $curl = curl_init("http://localhost:3000/api/revalidate?path=/blog/" . $slug . "&token=" . REVALIDATION_TOKEN);

  curl_setopt_array($curl, [
    CURLOPT_CUSTOMREQUEST => 'GET',
    CURLOPT_RETURNTRANSFER => 1
  ]);

  curl_exec($curl);
  curl_close($curl);
}
Don't forget to change your front end domain here.
Testing it Locally
To test it locally, you will need to run yarn build and yarn start on your Next.js project. If you use yarn dev the page will always be regenerated everytime you refresh it, so you won't be able to see the revalidation headers in action.
Choose a post in your Wordpress and open it in your front end. Open Developer Tools in your browser and open the Network tab. Wait for a minute and refresh the page, you should see the headers calling the page cache STALE.
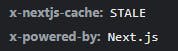
Refresh the page again and it should show you HIT, indicating that your request got a newer cache within those seconds you set your page to revalidate.
Now, wait for another minute, go back to your Wordpress, change something in the post and hit the Update Post button. If it worked, the next time you refresh the post page on Next.js, you should receive a HIT cache header again, instead of a STALE.
There you go!! You've successfully added automatic revalidation to your Wordpress + Next.js website!